This is the second of two posts. To read the first, on audio engineering, click here.
Bundles provide you with a lot of flexibility in presentation, so care must be taken to put your best foot forward. Encoding media content that looks professional can be achieved by paying attention to the following key things:
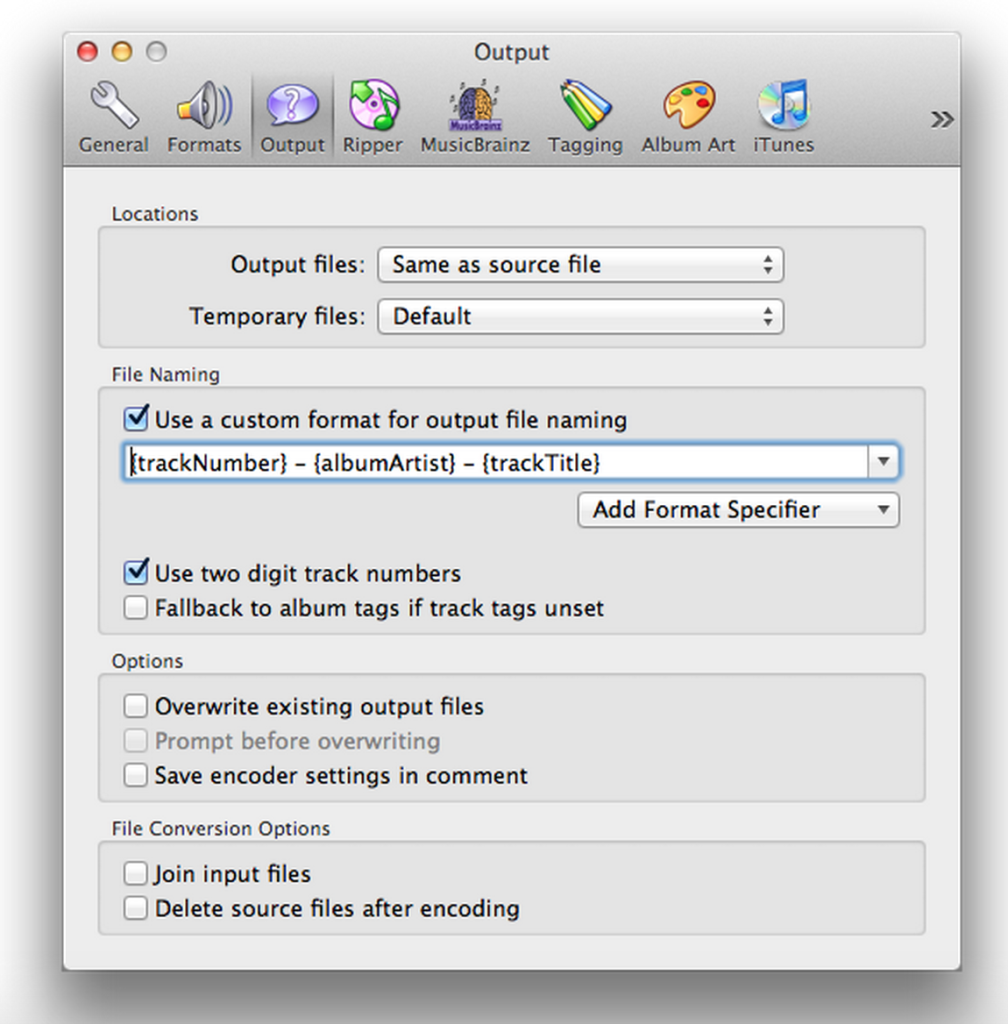
File naming — names should have a standard formatting across all of your songs. If they’re meant to be played in order, include a number at the beginning of the filename. There’s no need to replace spaces with underscores. Something like “01 – Artist Name – Song Name.mp3” is good.
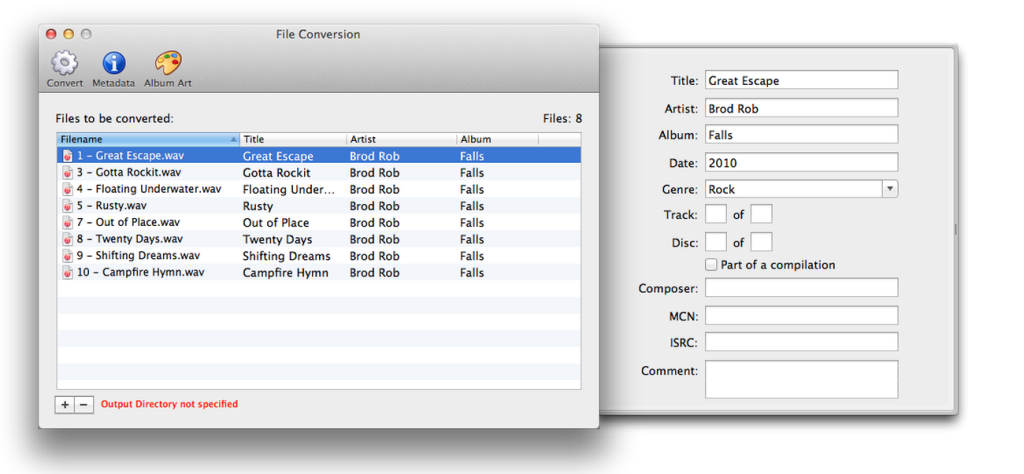
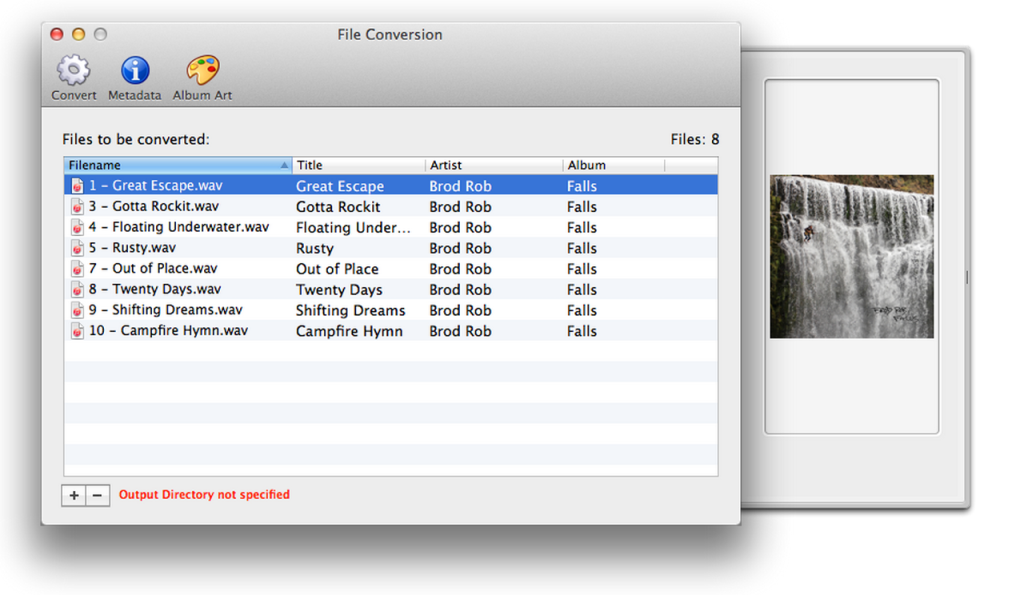
File Metadata — Include proper tags in your MP3 files so that the artist and song names appear correctly. They should match the filename as closely as possible. If you have cover art, embed it in the MP3 tags so that it will appear on all devices.
File Structure — Don’t wrap all of your files in a .zip unless you’re wrapping up numerous small images. You don’t save any space by zipping compressed audio/video, and the BitTorrent protocol already ensures that your content arrives intact.
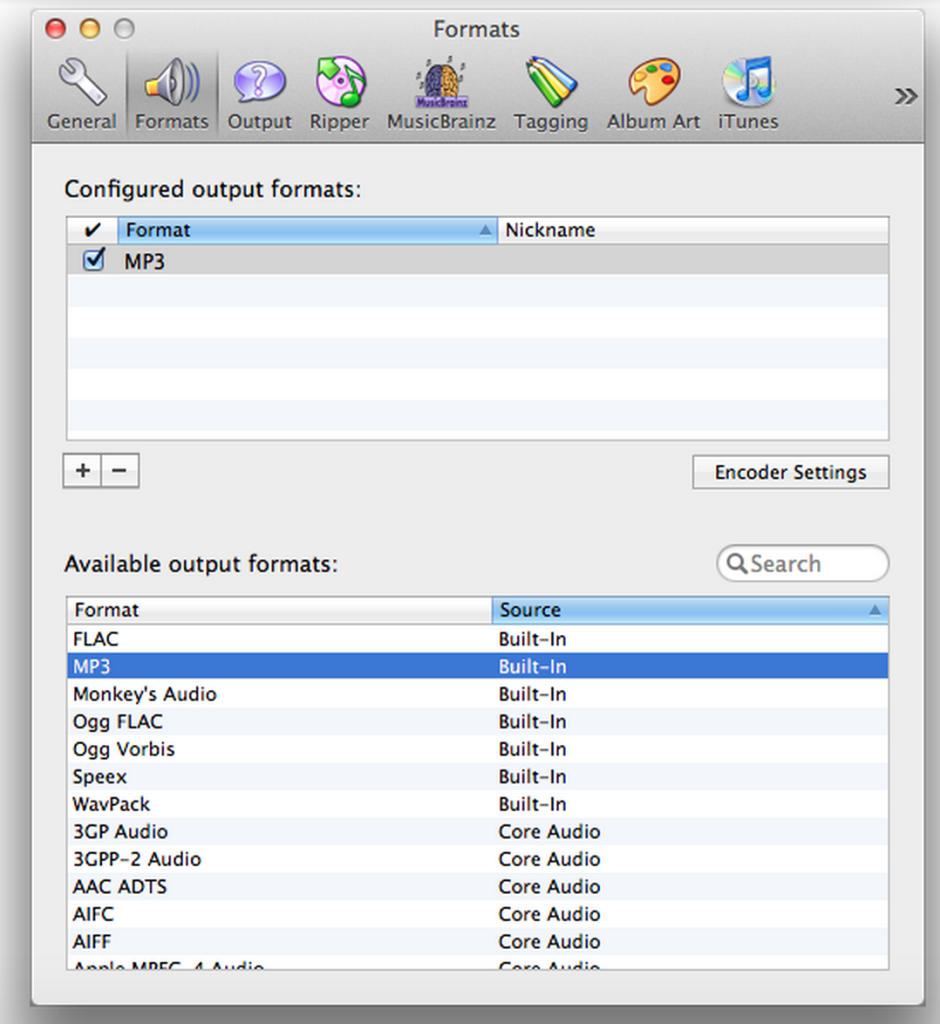
Encoding — Encode all files with the same settings. Use a format that is widely supported, such as MP3 (for audio) and MP4/H.264 (for video).
Encoding Applications
Encoding applications are often a very personal choice. Finding a user interface that is both intuitive and gives you the power you need can be a challenge. I’ve done some legwork to find some (free) tools that will allow proper encoding and complete metadata generation.
Mac
For the Mac, I like Max (sbooth.org). It allows you to both encode with the LAME MP3 encoder, and also fill out metadata with embedded images.
Adding Metadata to Files with Max
Adding embedded images to files with Max
Recommended file name settings in Max
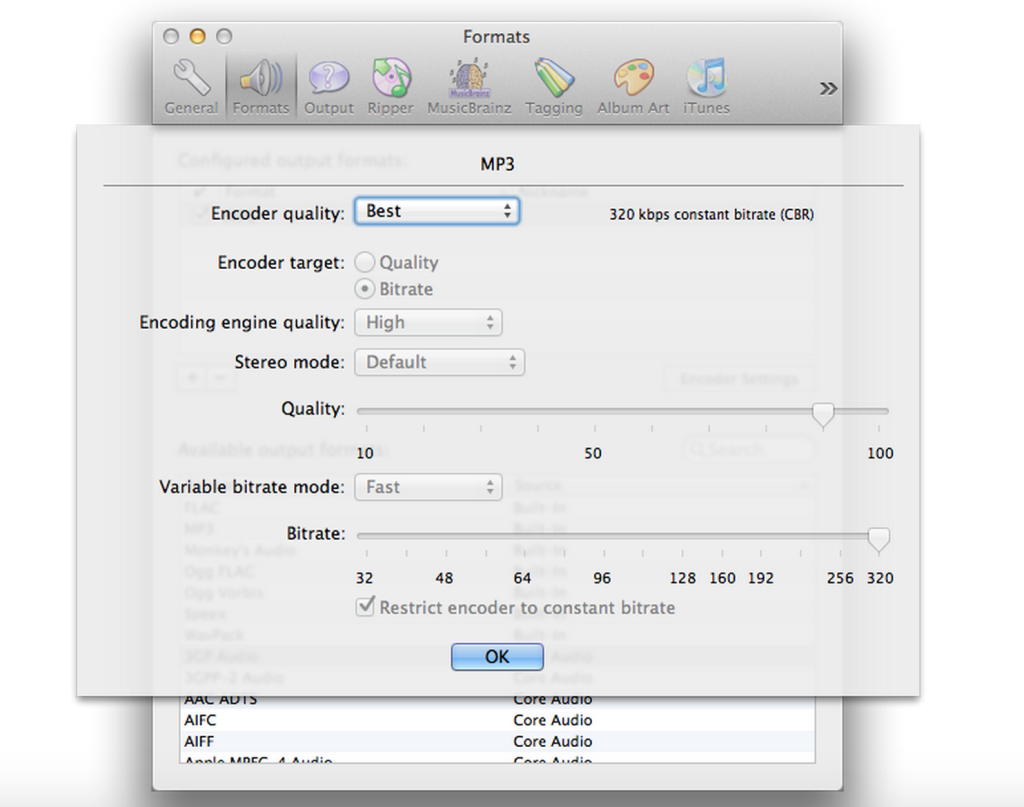
Configuring the Encoder in Max
LAME settings in Max
Windows
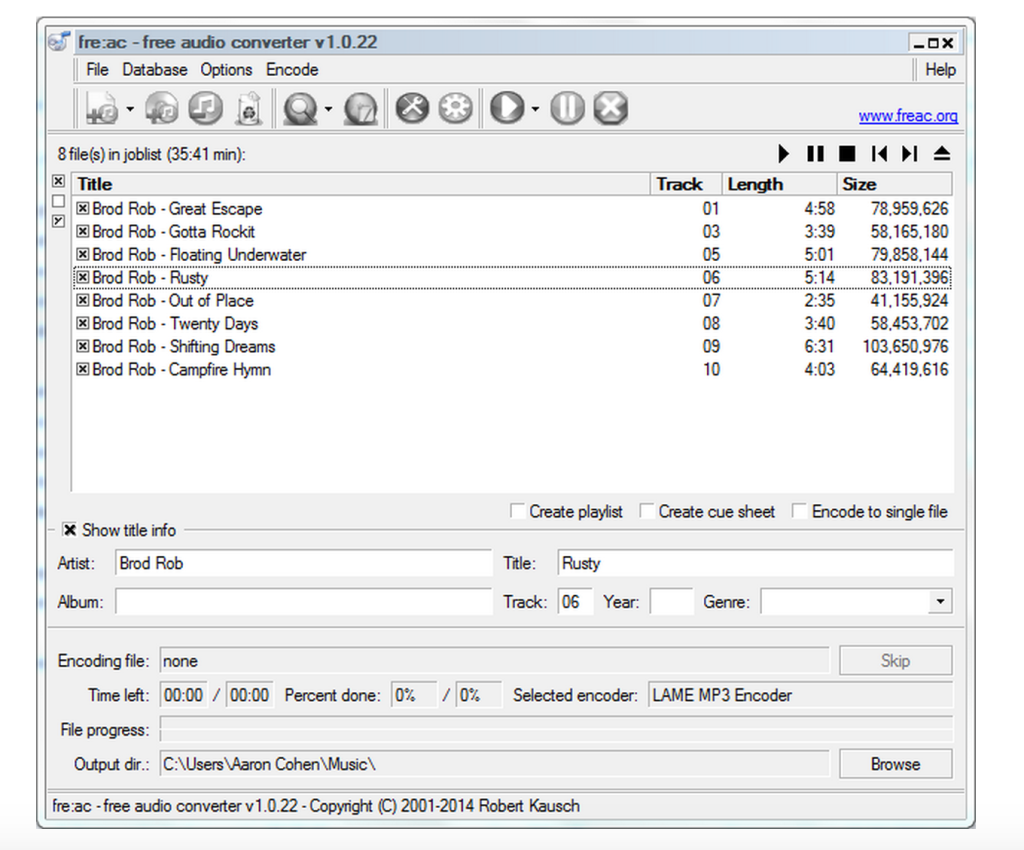
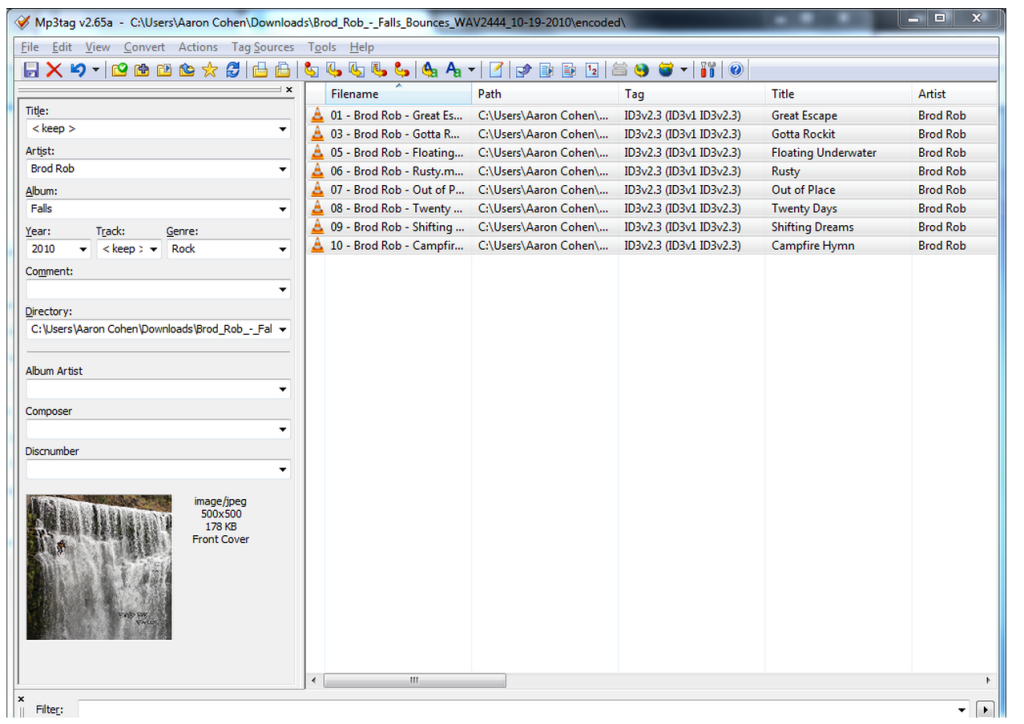
On Windows, it’s a little harder to find a free tool that does everything we want. We’ll have to settle for a combination of two apps. fre:ac gives a good encoding interface. Mp3tag will let us compose metadata with the flexibility we need, as well as embed images.
Encoding files with fre:ac
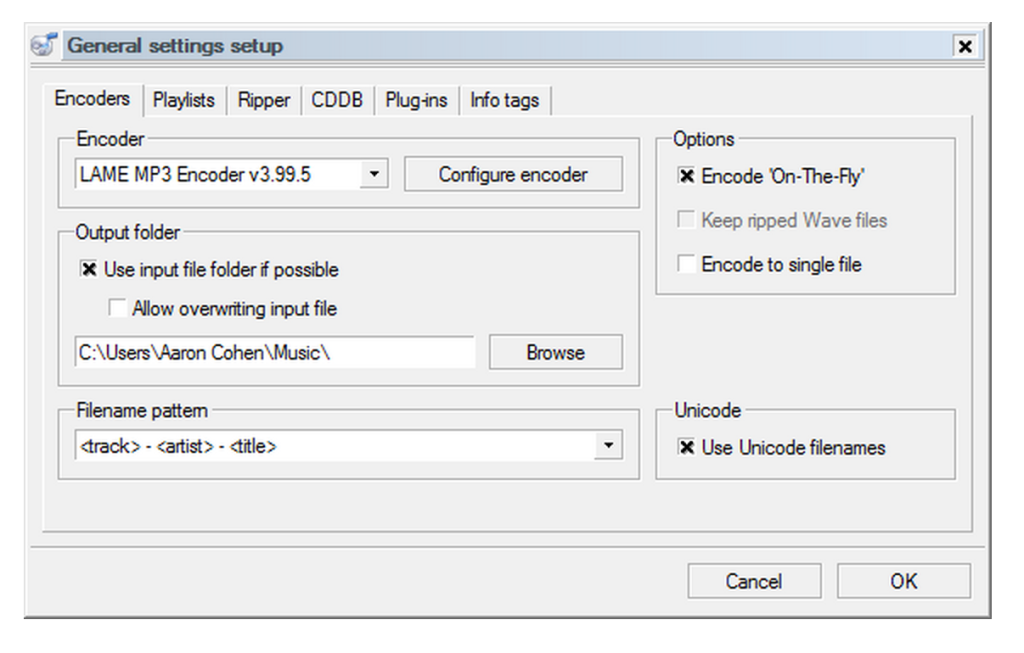
Choosing the encoder in fre:ac
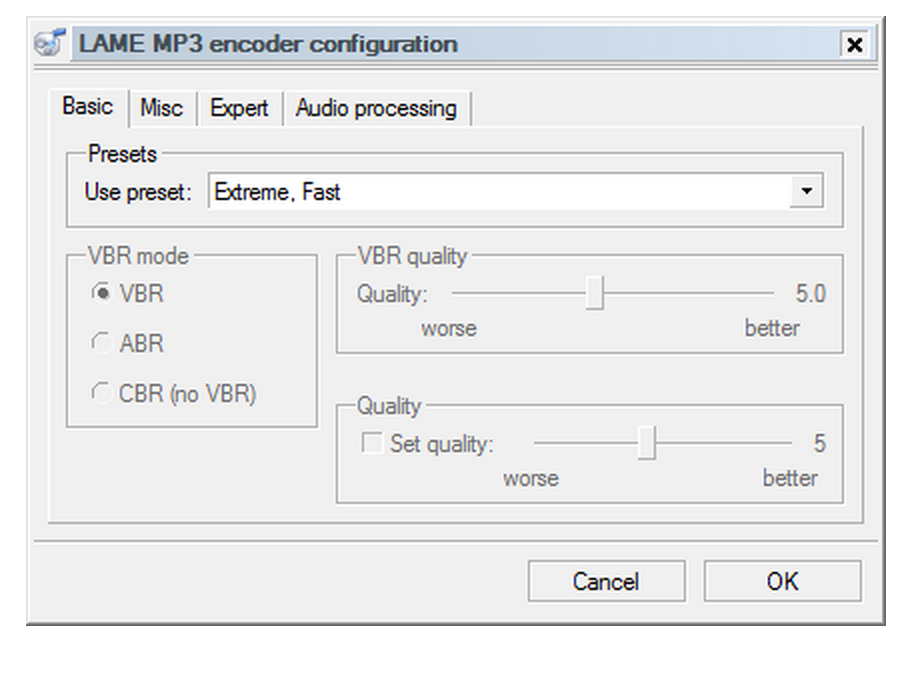
LAME encoder settings in fre:ac
Adding tags and artwork in mp3tag
While there are a lot of opinions out there as to the “best” audio encoding format, using MP3 is the best in this situation. It guarantees playability in nearly every circumstance, even with older car stereos or mobile devices.
Audio
The highest quality MP3 encoder is known as LAME. It has achieved sound quality far beyond that of other MP3 encoders, especially the early ones that were notorious for “swimming cymbal” artifacts. The applications we recommend all feature LAME, built-in.
LAME provides a number of quality presets. For the purposes of a Bundle, it is recommended that you choose either the “V0”, “Extreme”, or “Insane” presets. These will provide a quality that is effectively indistinguishable from a CD.
Video
Video is a somewhat more complex beast than audio. Not only are there multiple ways of encoding the content (the Codec), there are numerous ways to contain that encoded content in a file (the Container).
For the best quality/compatibility balance, we recommend encoding your video with the H.264 video codec, inside an MP4 video container. The vast array of quality parameters available in H.264 are too complex to get into here. Suffice to say, that short of doing a lot of research, you’re probably best off using your video encoding application’s presets.
Feel free to include extremely high quality video in your Bundle, even up to 1080P resolution. To be watchable by the largest audience, however, target an average bitrate of 2.0Mbps. Previews will be automatically generated for display on your Bundle’s page. You can always count on users being able to try out your content in advance, no matter how big it is.
Consistency, Consistency, Consistency
As music fans amass larger and larger collections of music, it becomes increasingly important to include accurate metadata in the files you provide them. Always be sure to fill out the Artist, Song, Album, Year, and Genre fields, and do so consistently. Capitalization and spacing matter. If your Bundle is a collection of music from multiple artists, put the original artist’s name in the Artist field for each song, and put your name in the Album Artist field for all of the songs.
If you like, you can also add additional tags on the Bundles website to make it easier to search for your Bundle. To do so, click “Show Advanced Settings” on the Create Your Bundle page. At the same time, you can also add Social links, as well as set a Launch Date for your work to be shown to the world.
The are two formats for storing tags/metadata in an MP3 file: ID3 v1 and ID3 v2. The first version has a number of limitations, including no support for international characters and a 30 character limit in most fields. Version 2 removes these restrictions and is far more flexible in general. Both types of tags can be included in a single MP3 file.
As long as your song title and artist name can be reasonably stored in an ID3 v1 tag, there is no reason not to include it in addition to a v2 tag. Doing so gives a slightly wider compatibility with older hardware devices.
One of the nicest features of ID3 v2 is the ability to embed images within the tag. This ensures that listeners have album art wherever the music is being played. This is also the only way to have album art displayed in iTunes.
The only downside of this approach is that it increases the size of each MP3 equal to the size of the image. It’s fairly standard to use a small version of the image, approximately 500×500 pixels, saved as a JPG file.
If you should so desire, you can embed unique images per song, or include multiple images. Keep an eye on file size if you do, however.
Though most MP3 player applications support using embedded images, some people prefer to have the cover art stored as a separate JPG file in the Bundle directory. This image does not need to be reduced in size, allowing it to be much higher quality. Save files intended to be used in this manner as “cover.jpg”.
File Structure
The Bundle file structure is flat; there are no subfolders allowed. This ensures that the contents can be assessed in a glance. When composing your Bundle, it is possible to change the order of files, and to set a gate-point, after which access to files require a user to perform an action (like share their email address, or pay money). Name your files in a clear manner, so that downloaders will be enticed by the gated content.
When transferring files through other methods than BitTorrent, it is common to wrap them up as a ZIP file. This is not necessary when creating a Bundle. BitTorrent ensures that all of your files will arrive intact, and they’re already compressed when you encode them in MP3 or the other formats we’ve discussed here. The only time that you should consider zipping files in a Bundle is if you’re including a large quantity of photos that require a folder hierarchy. Keep in mind that people will be unable to preview your content if you do this.
Your Bundle is Ready
By following this guide we’ve given you the tools you need to create an enticing BitTorrent Bundle. It will, no doubt, become a seamless part of your fans’ music and video collections. What’s more, you’ll soon reap the benefits that Bundles have to offer…whether that be building your mailing list, or having new control over your sales and income.
If you haven’t yet, sign up for BitTorrent Bundles now.
